Expiration controls are useful for time-limited posts. Check the interface’s wording carefully: expiry, subscription renewal and a refund are different events.
Before you start
Sign in to the account you want to use. Creator-only controls appear only for accounts with the relevant access. If you manage someone else’s account, confirm you are in the correct workspace before making a change. The pictures use fictional example data; your balances, names, available options and screen layout may differ.
Step by step
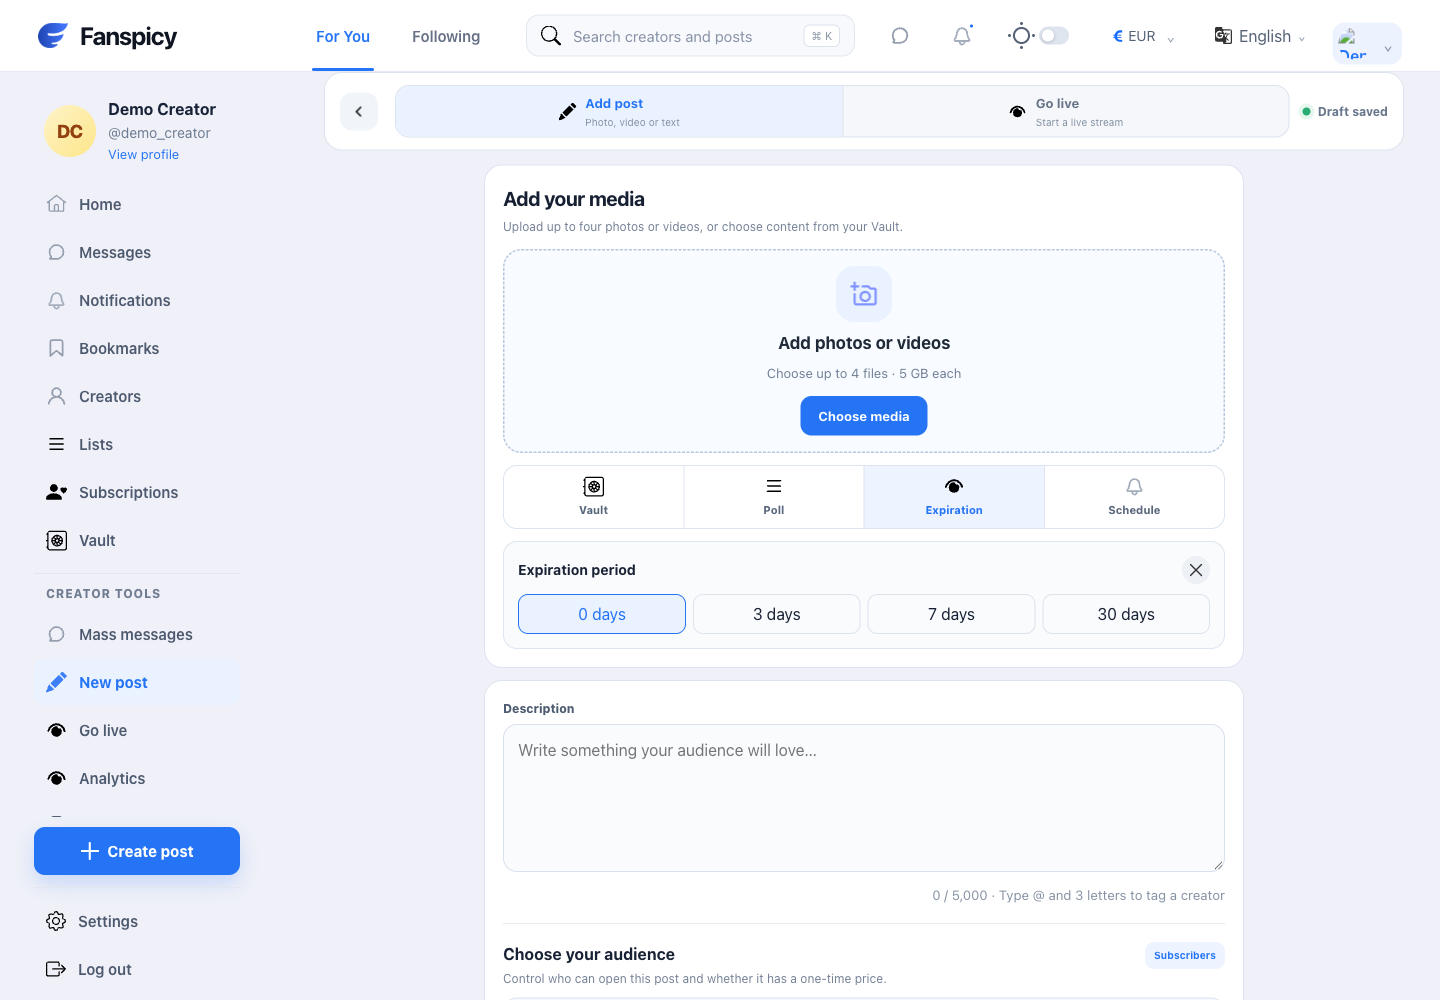
- Open the post composer and select Expiration.
- Review the available duration choices.
- Select the duration you intend to use.
- Review the audience and any unlock price before publishing.
- Check the saved post details after submission.
Check the result
An expiration setting does not itself prove a refund is due or that an existing payment has been reversed. Questions about paid access need the actual post and purchase records.
If something is not working
If a post disappears unexpectedly, report its reference and last visible time. Ask support to inspect the expiration and publication state instead of uploading another paid copy immediately.
When reporting a problem, include the page, approximate time, what you expected and what happened instead. A screenshot of the error can help. Hide private messages and payment details that are unrelated to the issue. Never send your password, verification code, recovery code or API secret.