

目录
YouTube Live works by taking video and audio from your camera or screen, compressing it through an encoder, and sending it to YouTube’s servers over a secure connection called RTMPS using a stream URL and stream key. YouTube then transcodes that feed into multiple quality levels and distributes it worldwide through its CDN. Your next move: confirm your channel qualifies, pick a streaming method, and run a private test before going public.
TL;DR:
- A verified, age-appropriate channel without recent streaming restrictions is essential, and compliance with YouTube’s limits on streams and stream keys matters.
- Stable upload speeds of at least 6 Mbps are crucial, and lower resolutions with consistent bitrates outperform higher but unstable settings to prevent buffering.
- Pre-stream testing focusing on network, audio, and video quality reduces common issues like dropped frames, audio problems, or permission errors.
- Monitoring through YouTube Studio’s Live Control Room provides real-time feedback on stream health and moderation tools to manage chat and privacy settings.
目录
- What Are YouTube’s Eligibility Requirements for Live Streaming?
- Which Streaming Method Fits Your Setup: Mobile, Webcam, Encoder, or Console?
- How Does Video Travel From Your Camera to a Viewer’s Screen?
- What Encoder Settings Does YouTube Actually Recommend?
- How Do You Set Up and Start a Live Stream?
- What Should You Check Before Every Live Stream?
- Where Do You Monitor and Moderate a Live Stream?
- How Do You Fix the Most Common Live Streaming Problems?
- What Matters Most When You’re Just Getting Started?
- Sources
What Are YouTube’s Eligibility Requirements for Live Streaming?
Before any technical setup matters, your channel has to clear YouTube’s baseline gate. You need to be at least 16 years old, and your channel must be verified through phone confirmation. Skip verification and the “Go Live” button simply won’t respond the way you expect.
YouTube also checks your recent history. If your account picked up a live streaming restriction in the last 90 days, whether from a copyright claim or a community guidelines strike, you’re locked out of live features until that window clears, according to YouTube’s live streaming requirements.
A few other limits are worth knowing before you plan a broadcast schedule:
- Minimum age is the required age with a verified channel.
- No recent live streaming restrictions should be applied to your account.
- Limits exist on the number of active streams and stream keys allowed per channel.
These rules exist to curb abuse, not to punish new creators, but they trip up more first-time streamers than any technical setting does.
Which Streaming Method Fits Your Setup: Mobile, Webcam, Encoder, or Console?
The method you choose depends less on budget and more on what you’re actually broadcasting. Each option trades simplicity for control in a different way.
- Mobile: The fastest way to go live from wherever you are. It’s ideal for on-location content, Q&As, or spontaneous updates, though some mobile live features require a minimum subscriber count or channel verification first.
- Webcam: The simplest desktop option. If you’re recording a talk show, a vlog-style update, or a straightforward face-to-camera session, YouTube Studio’s built-in webcam mode gets you live in a couple of clicks with no extra software.
- Encoder (software or hardware): This is where production value climbs. Software encoders like OBS Studio, or hardware units, let you mix multiple cameras, add overlays, share your screen, and route in external audio. It’s the standard choice for gaming streams, panel discussions, or anything with more than one video source.
- Console: Streaming directly from a PlayStation or Xbox is convenient, but it comes with platform-specific limitations on customization and stream settings compared to a dedicated encoder.
If you’re unsure where to start, FanSpicy’s setup workflow guide walks through picking a method based on your actual content format rather than guessing.
How Does Video Travel From Your Camera to a Viewer’s Screen?
Every YouTube Live broadcast follows the same five-step path, whether you’re running a phone camera or a full encoder rig.
- Capture: Your camera and microphone generate the raw signal. If you’re using an external camera with a software encoder, you’ll typically need a capture card to bring that feed into your computer, according to Epiphan’s beginner streaming guide.
- 编码: Software like OBS or a hardware encoder compresses that raw feed into a manageable file size. This step matters because uncompressed video would overwhelm almost any home internet connection.
- Ingest: The compressed stream travels to YouTube over RTMPS, a secure version of the RTMP protocol. Your stream URL and stream key act as the login credentials that tell YouTube this feed belongs to your channel.
- YouTube processing: YouTube transcodes your incoming stream into several bitrates and resolutions in real time, then pushes them out through its global CDN, per YouTube’s own encoder documentation.
- Delivery: Viewers receive whichever quality level matches their connection speed, adjusting automatically as conditions change.
Because YouTube handles the distribution side, your upload stability matters far more than living near a data center. A steady 6 Mbps connection beats a fast but flaky one every time.
What Encoder Settings Does YouTube Actually Recommend?
Get these values wrong and you’ll see buffering, dropped frames, or a rejected stream, even with a fast internet connection. YouTube’s own guidance is specific enough that you shouldn’t need to guess.
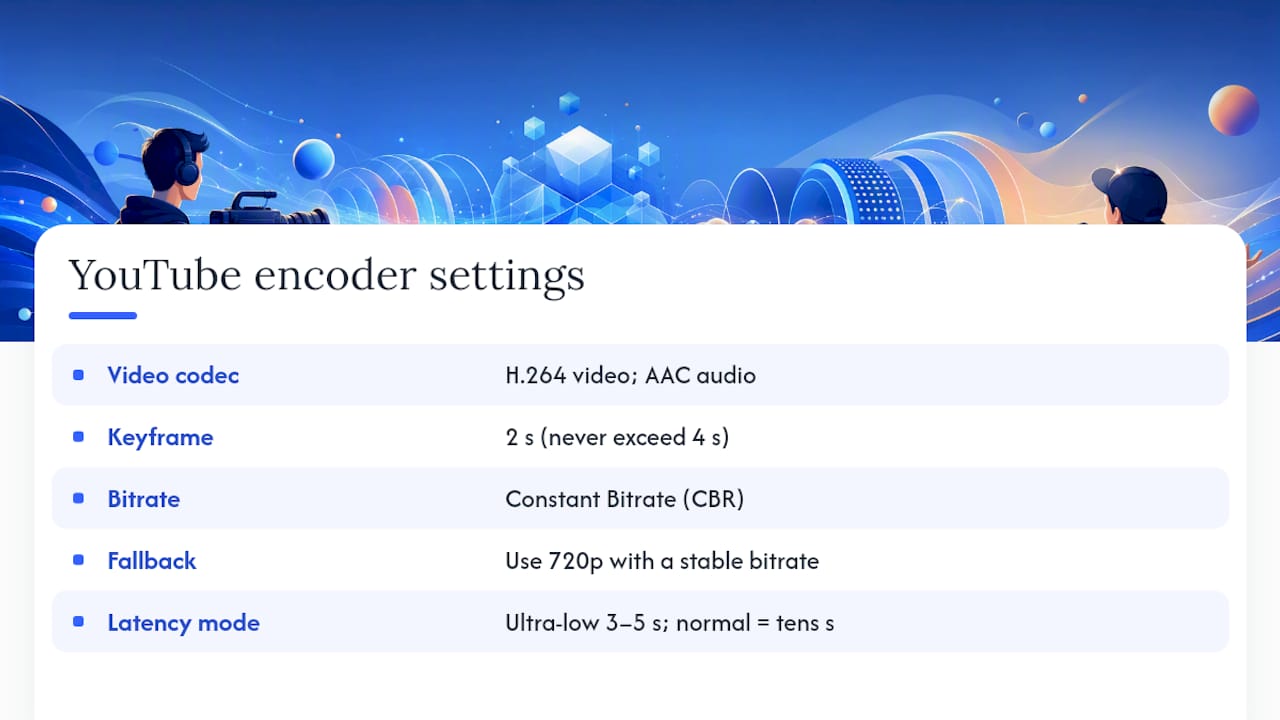
Use H.264 for video and AAC for audio. Set your keyframe interval to 2 seconds, and never exceed 4 seconds, since YouTube’s transcoding system expects keyframes at that cadence to switch between quality levels smoothly. Encode with Constant Bitrate (CBR) rather than variable, which keeps your upload predictable, according to YouTube’s live encoder settings guide. H.265 or AV1 only come into play for select HDR broadcasts, and most creators never need them.
专业提示 If your upload speed is inconsistent, start at 720p with a stable bitrate rather than pushing for 1080p and risking frequent buffering. A steady lower resolution beats a sharper one that keeps stalling.
Latency mode changes the equation too. Ultra-low latency can bring end-to-end delay down to roughly 3 to 5 seconds, which matters for live Q&As, while normal latency runs into the tens of seconds but tends to buffer less on shaky connections.
How Do You Set Up and Start a Live Stream?
The exact sequence changes slightly depending on your method, but the logic stays the same across all three.
For webcam streams:
- Confirm live streaming is enabled on your account.
- In YouTube Studio, select Create, then Go Live, then Webcam.
- Check that your microphone and camera are detected correctly.
- Set your title, description, and privacy setting (public, unlisted, or private).
- Click Go Live.
For mobile streams:
- Make sure your account is verified.
- Open the YouTube app and tap Create.
- Choose Go Live for immediate streaming or Schedule for later.
- Watch for mobile-specific constraints, like subscriber thresholds on certain features.
For encoder streams:
- Create a new stream in YouTube Studio’s Live Control Room.
- Copy the stream URL and stream key into your encoder software.
- Start the encoder so it begins sending video to YouTube.
- Once YouTube confirms it’s receiving your feed, click Go Live in the Control Room.
Scheduling ahead lets you add a trailer video that plays until you go live, which keeps early viewers engaged instead of staring at a blank preview. Once your broadcast ends, YouTube automatically archives it as a regular video on your channel.
What Should You Check Before Every Live Stream?
A short preflight routine catches most problems before they become visible to your audience. Treat this as non-negotiable, not optional polish.
- Network: Use wired Ethernet over Wi-Fi whenever possible, and check that no other device is hogging bandwidth with downloads or updates.
- Audio: Choose the right input device, set levels at your actual speaking volume rather than guessing, and monitor with headphones so you catch problems live.
- Video: Check your framing, add front-facing light, stabilize your camera, and confirm capture card detection if you’re using one.
- Workflow: Close unnecessary background apps, prep your scenes in advance, and run a private or unlisted test stream with real audio and movement.
That last point matters more than most creators realize. Testing with silence and a static frame tells you nothing about how your setup handles an actual conversation.
专业提示 Keep a one-line log after every test stream: one technical fix, one content fix. It sounds small, but it turns “something felt off” into a specific, repeatable improvement.
For a deeper walkthrough of this exact routine, FanSpicy’s best practices guide for creators covers audio and lighting habits that carry over from YouTube to almost any live platform.
Where Do You Monitor and Moderate a Live Stream?
YouTube Studio’s Live Control Room is your command center once you’re broadcasting. You’ll find it under the Live tab, where you can view current, upcoming, and past streams in one place, according to YouTube’s mobile live streaming guide.
- Stream health indicators flag issues like dropped frames or bitrate instability in real time, often before viewers notice anything wrong.
- Chat moderation tools let you slow chat, block users, or restrict comments to members only.
- Privacy and monetization toggles control whether the stream is public, unlisted, or limited to channel members.
- Archived replays appear automatically on your channel once the broadcast ends, ready for viewers who missed the live version.
How Do You Fix the Most Common Live Streaming Problems?
Most live streaming failures fall into four categories, and each has a fast diagnostic path.
- Network drops: Switch to a wired connection, lower your bitrate, and pause any other uploads or downloads running in the background.
- Dropped frames or encoder overload: Check whether your CPU or GPU is maxed out during encoding, reduce your output resolution or frame rate, and shut down apps you don’t need open.
- Audio issues: Verify you selected the correct input device, confirm sample rate settings match, and monitor sound locally so you catch silence or distortion immediately.
- Stream key or permission errors: Recheck your channel verification status and confirm no restriction is active. If you suspect your stream key was exposed, rotate it immediately in YouTube Studio.
Running through this list in order, rather than randomly, saves you from chasing the wrong fix while your stream sits frozen.
What Matters Most When You’re Just Getting Started?
Most new streamers spend their first budget on a better camera. That’s backward. Audio clarity and connection stability determine whether people stay watching far more than resolution does, and fixing those two things costs you time, not money.
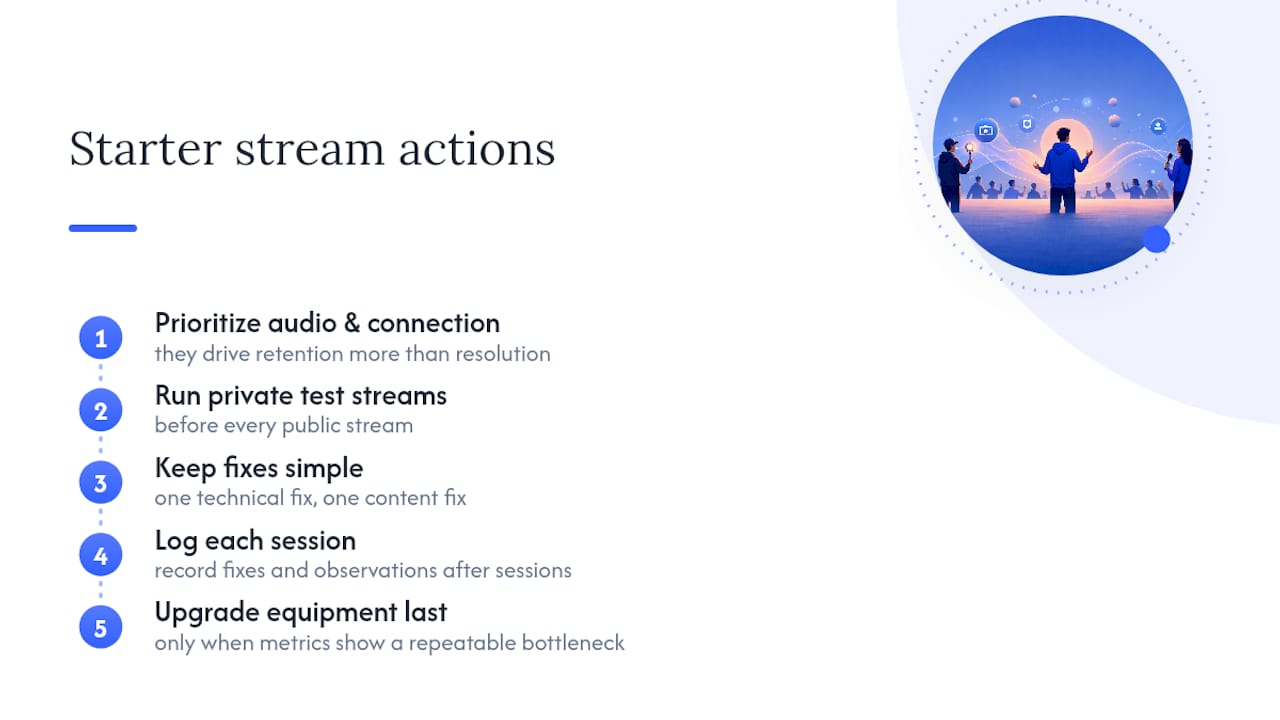
Run private test streams before every public one, and keep it simple: one technical fix, one content fix, logged after each session. That habit builds a feedback loop that a gear upgrade never will. Only reach for new equipment once your stream health indicators point to a specific, repeatable bottleneck, like consistent dropped frames under normal network conditions.
If you’re building a broader creator workflow beyond YouTube, FanSpicy’s guide to live streaming for creators breaks down how the same principles apply across platforms and monetization models.
— fan
Sources
- Get started with live streaming – Android – YouTube Help
- Choose live encoder settings, bitrates, and resolutions – YouTube Help
- How to live stream for beginners – Epiphan blog
- How YouTube Live Streaming Works (2026 Guide) · NeonStreamLab